(continued from Input Methods)
There are five basic screen within the Write-On software application. This section provides a brief description of each screen.
What is Ready Pad? Ready Pad is an intuitive approach to entering an order. In essence,Ready Pad, is the default opening screen for the Write-On device. The default screen is a blank order entry screen as in the Order Entry Screen section. The advantage of Ready Pad lies in that the Write-On is always ready to take an order, without having to first assign a table or tab and the number of customers before you can start entering menu items. The table number (or tab reference) is recorded while taking the order by use of the [Table] button or Reference (R) and Customer Count(CC) general commands. These buttons and commands can be used any time during the ordering process. However it is recommended you enter this information at the end of the ordering process. You will be prompted to enter table number and customer count when using the [Send] button. Upon completing this process, you will be brought back to a blank Order Entry screen:that's Ready Pad.
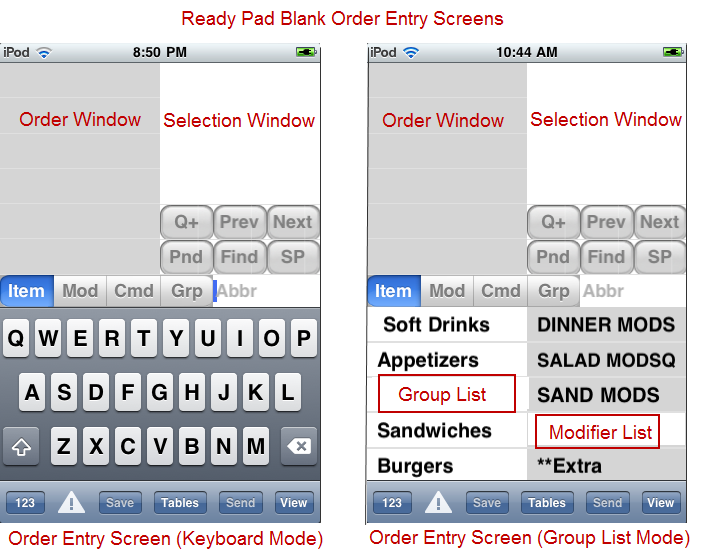
The Order Entry screen is where you will perform functions such as adding and deleting items on a specific order.The following is a summary of the basic function you can perform on a guest check.
The Order Window on the upper left side of the Order screen displays the items already on the order. Tapping Items on the Order window will affect Item command selections in the Selection window. The bottom two rows of the Order window are dedicated to displaying order information. Specifically, the top row will display table or tab numbers along with customer counts. The lower row will display reference information if entered.
Under the Order Window, on the left are the Function Buttons buttons. Use the buttons to switch between item, command, modifier and group input modes. The Function buttons will turn colors when selected. Just to the right of the function buttons is the abbreviation field (abrr) is where characters (abbreviations) are displayed when using the keyboard.
Note: the [Item] and [Mod] function buttons are disabled in Group List Mode.
The right window is known as the Selection Window. In general, the selection window will display possible selections for the active mode including menu or modifier items, commands, and menu groups. For example, in item mode, as you write letters in the Item Input Area, all items that match the entered abbreviation will appear in this window automatically. To select an item to go onto the order you simply touch it. Similarly, if in Modifier mode, the selection window will show modifiers. Abbreviations will appear to the right of both item and commands listed in the selection window.
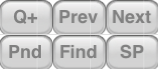
Speed buttons are located with the Selection Window and allow you to quickly access frequently used commands.The Speed buttons will move down the Selection Window depending on the amount of menu item, modifiers or commands listed. You can navigate to these buttons by flicking your finger/stylus in an upward motion on the screen. Speed button functions are covered in the section: Order Entry Functions (Speed Buttons)
At the bottom of the screen lies the tool bar, which also includes a number of speed buttons used to process an order. Toolbar functions are covered in the section Order Entry Functions: Toolbar
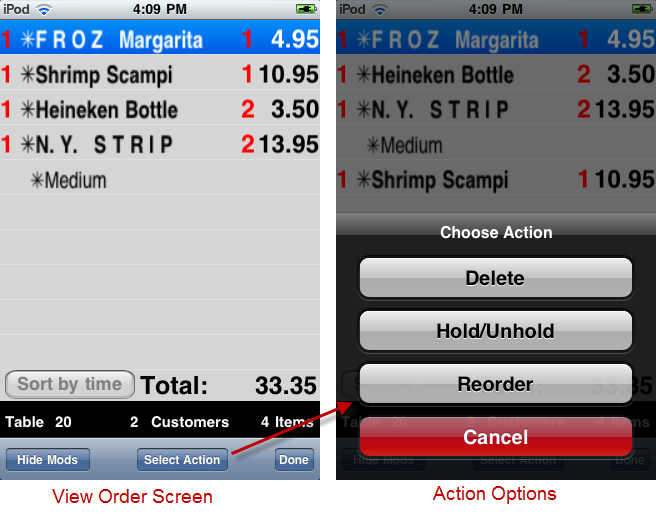
The View Order Screen allows you to view more of an order than what might be displayed in the Order Window of the Order Entry screen. The View order screen is accessed by pressing the [View] button located on the bottom toolbar. Items on this screen are listed in the order rung . You can sort the order items are listed by seat using the [Sort by Seat] number. This list can be resorted by time using the [Sort by Time] button. Use the [Hide Mods] button on the bottom toolbar to view more menu items on the menu list rows. Additional functionality is found under the [Select Action] button on the lower toolbar. The options under the Select Action menu include:
You must first select the menu items on the screen before pressing the [Select Action] button. Both the Delete and Hold/Unhold options are available commands in the Order Entry screen. However, the advantage to using the same function in the View Order screen is that you can affect multiple items at the same where the same commands may only be performed on one item at a time in the Order Entry screen.
At the bottom of the screen you will find the Order Information bar. This will list table/tab numbers, customer counts, and an item count total.
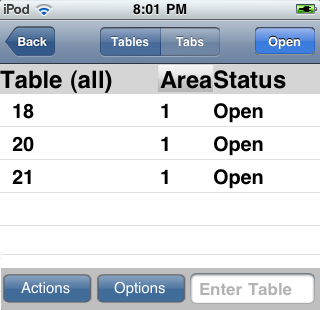
The Table Selection screen shows all the open tables for the server currently logged on to the handheld. Via this screen you can Print, Settle, or Clear any selected table using the [Actions] button. The following describes the actions of the ablutions found in the Actions menu:
Print button- will print paper receipts for the chosen table. If it is a split check, you will be prompted to choose one or more splits you wish to print. The printer used will be according to the current settings in the printer menu.
Settle button- will take you to a screen dedicated to settlement, including applying payments, modifying payments, adding a tip, submitting credit cards for approval, and finalization of the check.
Clear button- use to allow the table to be opened under a new check. Note: this is only relevant if the system is configured to require the clearing of tables. Tables go to the “To Be Cleared” state after finalization.
You may also access open orders using the [Open] button after selecting a table displayed on the list.
If needed, you can view tables and tabs belonging to other employees by first selecting [Options] button of the Table or Tab selection screen. In the next prompt you may select [Choose All] to view tables and tabs belonging to others or [Cancel] to exit from the process and continuing viewing your own tables. Note that performing this function will affect both tables and tabs displayed on the screen. You may change the tables\tabs displayed to only your orders by pressing the same [Options] button and selecting the [Show Just Mine] option.
You can toggle between selection screens by touching the blue label Table/Tab button located at the top of the screen.
The Tab Selection Screen is similar to the Table Selection screen with the exception of one button under the Actions button. Under the Actions options list there is a button named "Swipe". This function allows you to swipe a credit card to start a tab.
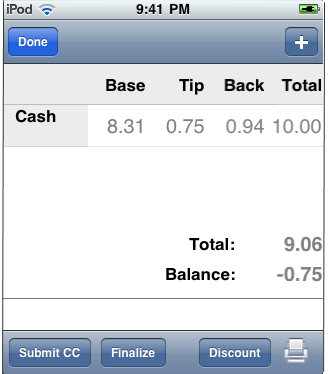
The Write-On for iPod touch provides full settlement functionality, including all pay types (except when hardware limited, as with Debitek), Voids, Credit Cards, payment modification, printing of receipts, and finalization. You can access payment types using the [+] button in the upper right corner of the screen. The main body of the screen will display all payment types applied to the order. The toolbar at the bottom contains function buttons that will submit credit cards, finalize transaction, and apply discount (will be implemented on future release). More detailed information on the settlement process can be found in the section: Settling an Order.